
Clean lens first
A smudged lens means a blurry photo, and no app can fix that. Wipe your lens before you start shooting, and carry a microfiber cloth on your visits.
How to edit
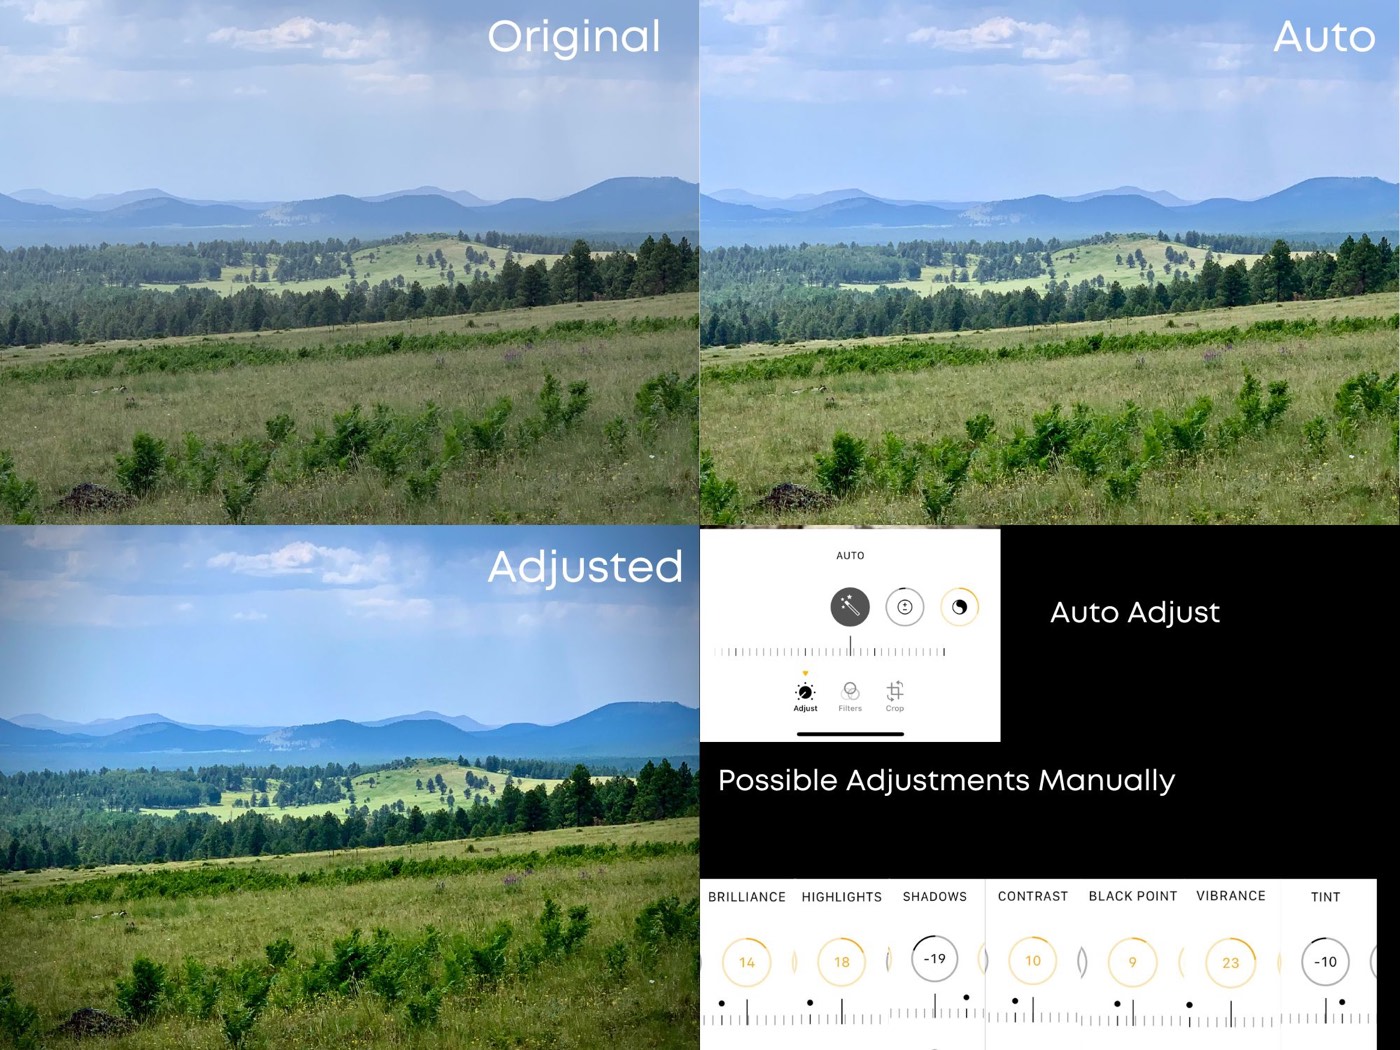
Start with auto. On an iPhone, open the photo, tap Edit, then tap Auto, the magic wand, for an instant boost.
Then adjust by hand. Small changes to a few settings do the most.
- Brilliance brightens the photo.
- Highlights and Shadows control contrast in the brightest and darkest areas.
- Vibrance boosts color.
- Definition adds a little sharpness.
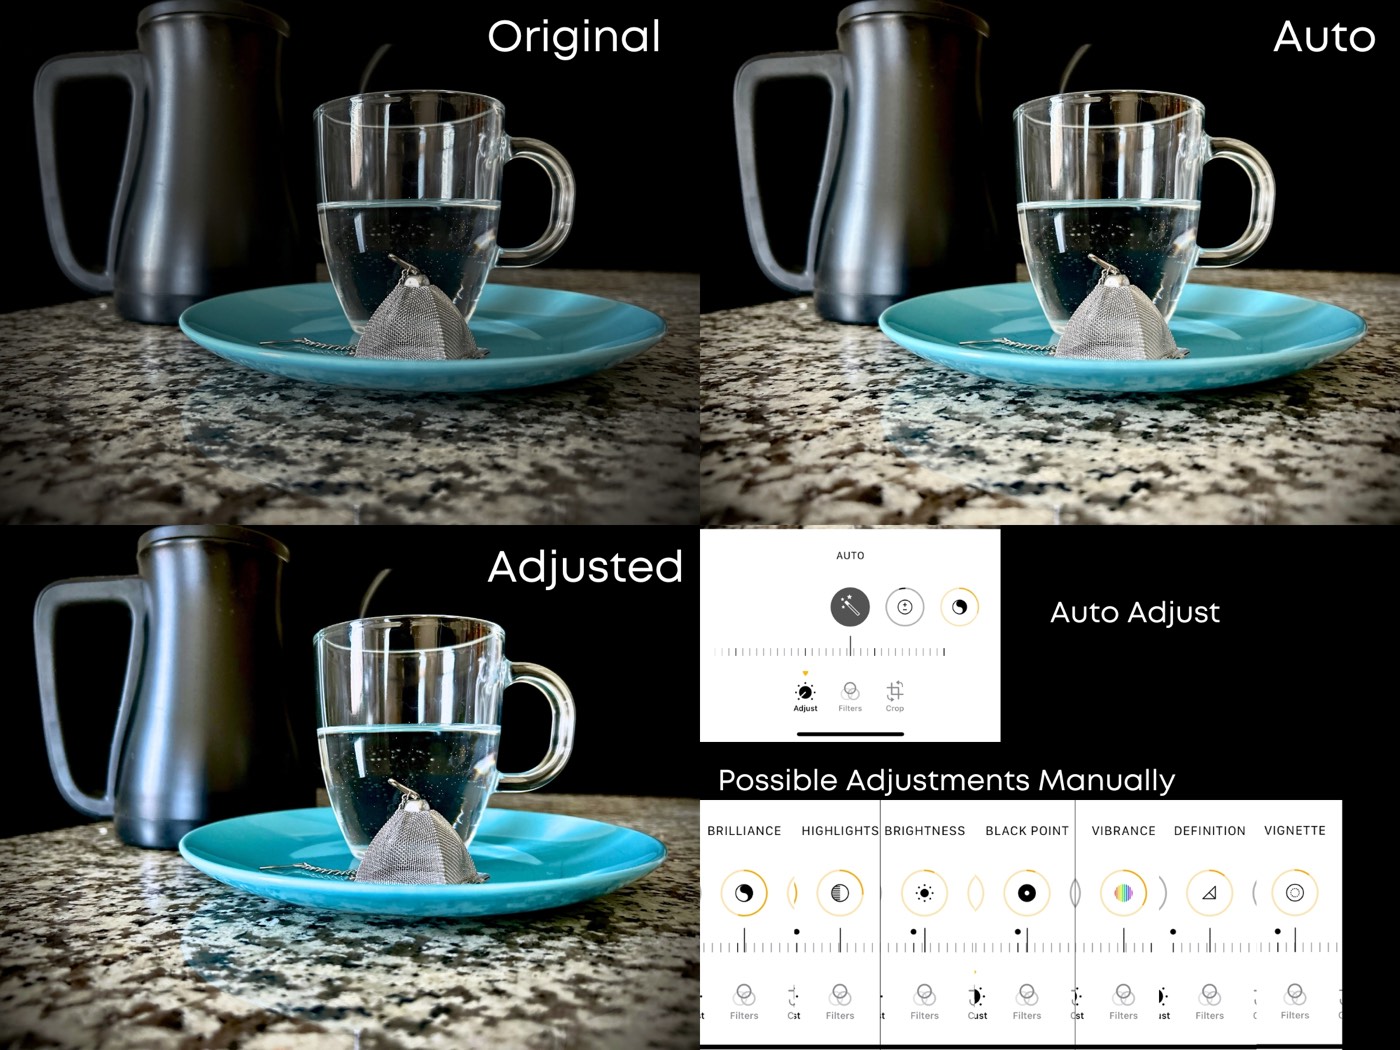
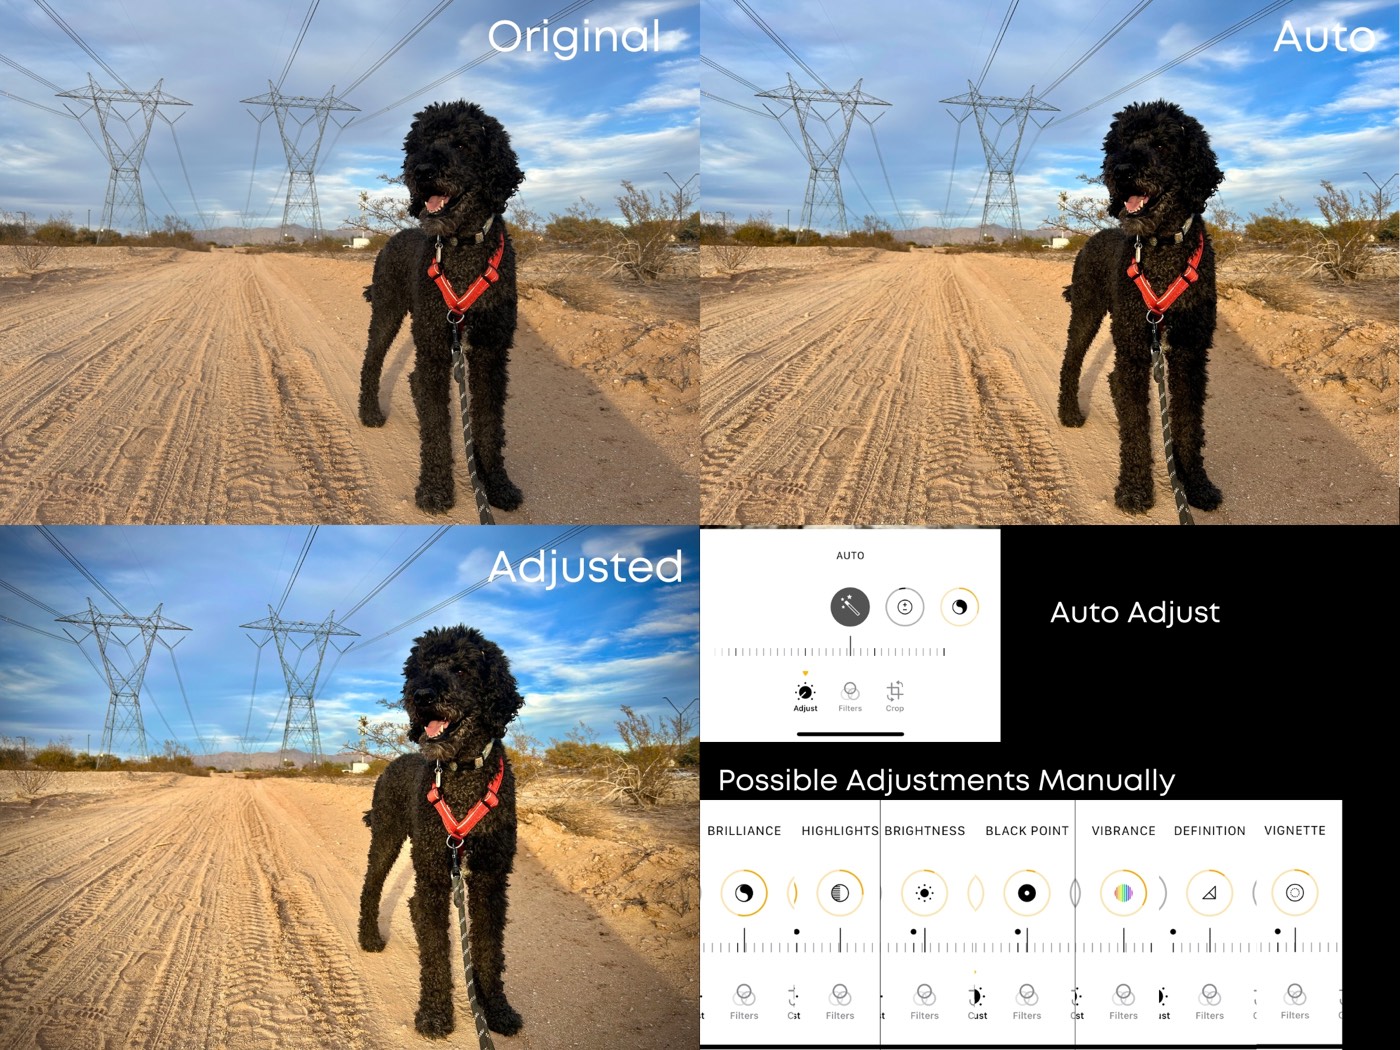
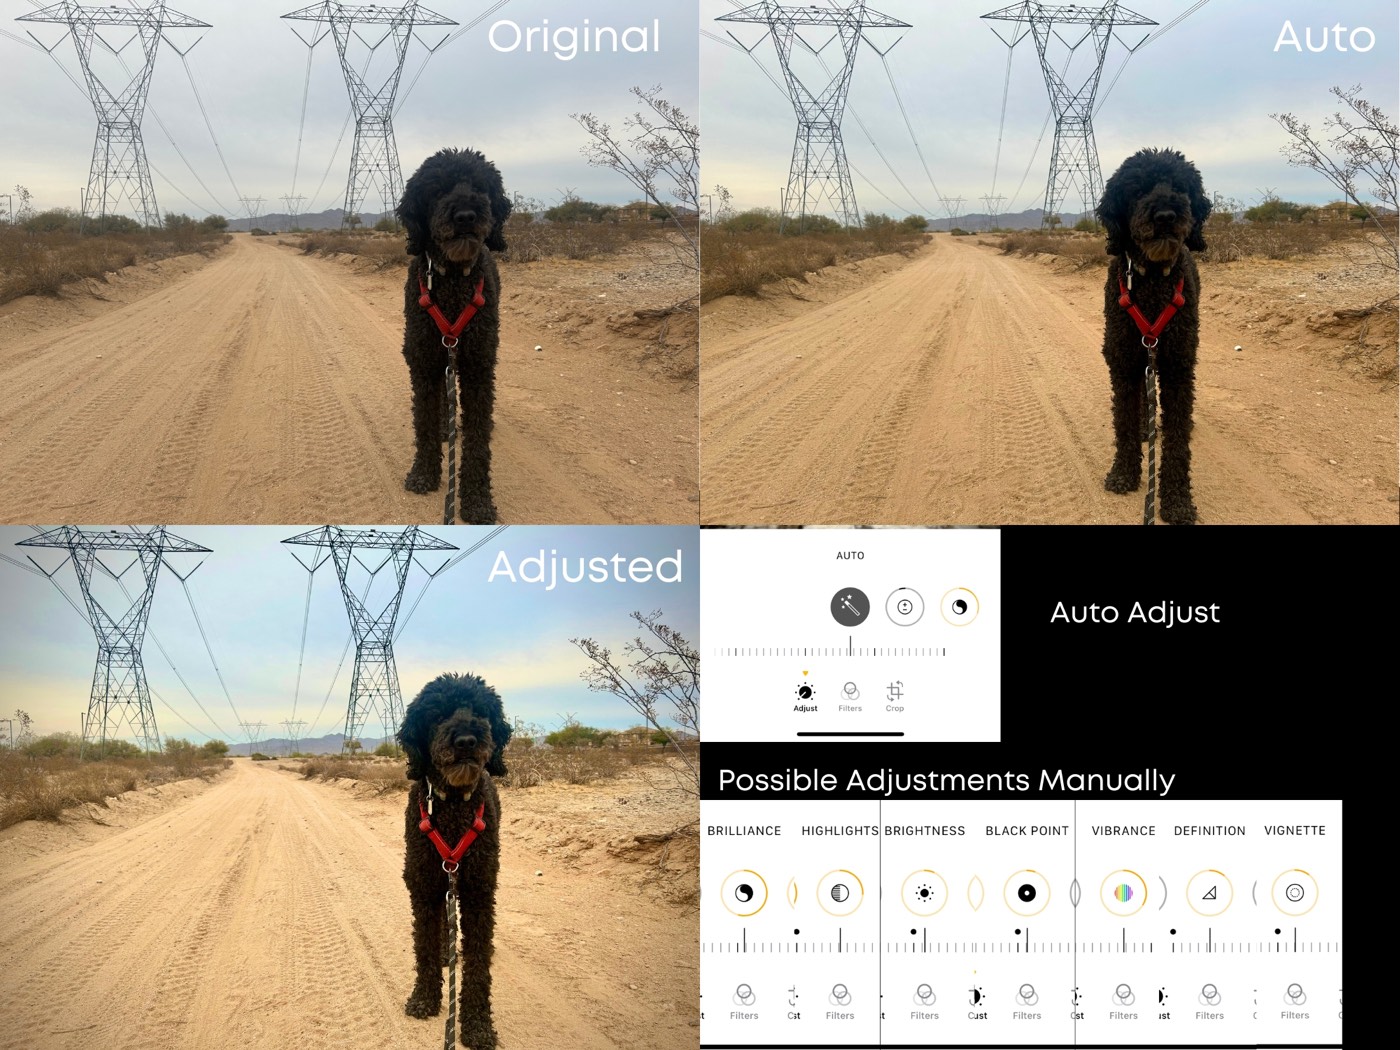
Each example below shows the original photo, the phone’s auto adjustment, and a version adjusted by hand.
Lighting fixes
Lighting can make or break a shot, but a dim restaurant or a cloudy day doesn’t have to ruin it, and you don’t need extra gear.
Indoor low light
Auto brightens the photo a little. Adjusting brilliance, highlights, and shadows makes it pop.
Partly cloudy
When a dark subject looks like a shadow, auto struggles. Adjusting brilliance and contrast brings out the details.
Cloudy day
Small changes to brilliance, highlights, and shadows turn a flat shot into one with detail.
Color fixes
Sometimes a photo feels flat and the colors look dull. A little editing brings them back.
Rainy mountain
Auto helps, but a touch of brilliance, contrast, vibrance, and tint gives the shot a natural glow.
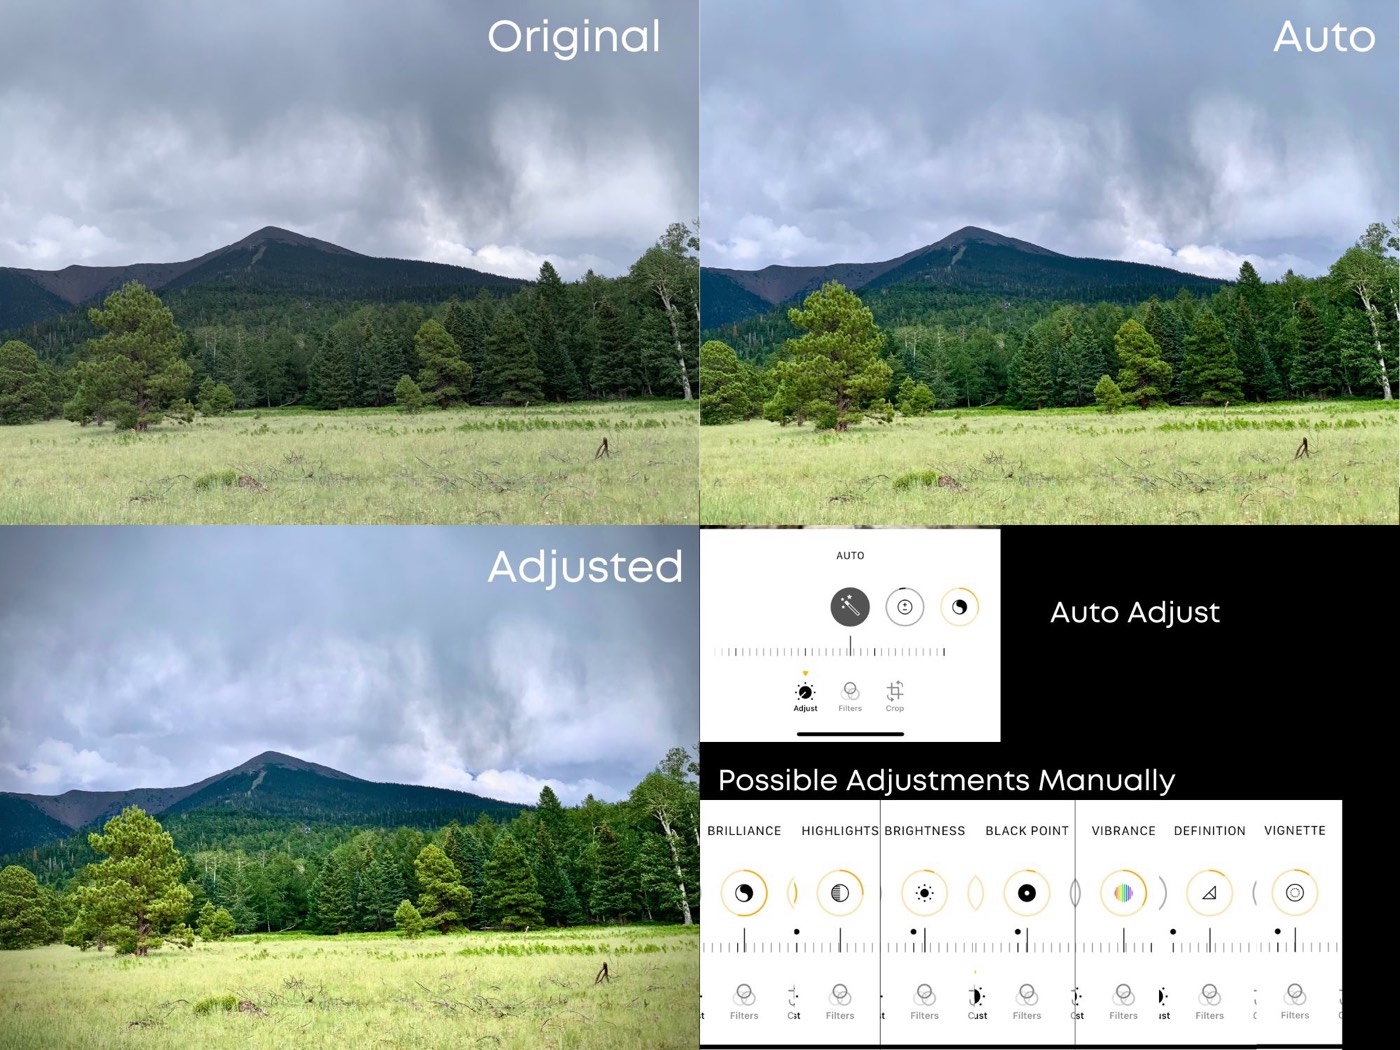
Rainy meadow
Even an ordinary shot can shine. Adjusting highlights, shadows, and definition makes it match how you remember the scene.
Avoid overediting
Push the colors and contrast too far and a photo turns cartoonish. Bright, unrealistic colors look fake and can even start to look pixelated. Subtle edits win.